| View previous topic :: View next topic |
| Author |
Message |
mb41186
Trick Member


Joined: 25 Oct 2005
Location: Texas, Rio Grande Valley |
0.  Posted: Tue Sep 30, 2008 7:47 pm Post subject: Modifying my Metal pad Posted: Tue Sep 30, 2008 7:47 pm Post subject: Modifying my Metal pad |
 |
|
Ok so I have doing a lil research on building your own metal pad and although it seems like a lot of work which it is, I don't want too mess with all the wood/metal/wiring for a new pad.
I already own a 3" metal pad a TX2500 pictured/details here http://www.fundepots.com/tx25013in1-metal-ps2xboxpc-update-versio-p-195.html?cPath=27&osCsid=1653c4da2a2a60cde94113ee220f9b0e
The control box is universal for PC/PS2/Xbox and Wii.
But what I wanted too know if there was a way too modify it by maybe adding actual arcade sensors, I know its possible I just want too know how hard it will be, I'v taken the pad apart and doesn't seem like it'll be too much work, just some sawing of the wood and rewiring the old crappy sensors too a couple of actual arcade sensors, maybe some saughtering.
Has anyone done this that may have some knowledge of doing this?
Keep in mind I am wanting too replace the crappy plastic pieces of poopy that they call pad arrows with acryilic panels or plexiglass that is a little thicker and adding brackets for each pad.
The reason why im doing this is because Im wanting a blue shark but those things are always sold out and since I already have a pad that I don't use and is collecting dust thought it might make a fun project.
Any help would be great. I will post up pictures of the pad once I get them on photobucket. |
|
| Back to top |
|
 |
mb41186
Trick Member


Joined: 25 Oct 2005
Location: Texas, Rio Grande Valley |
1.  Posted: Tue Sep 30, 2008 10:21 pm Post subject: Posted: Tue Sep 30, 2008 10:21 pm Post subject: |
 |
|
Ok here are some pics as I take the pad apart

Pic without the arrows/x and o buttons aka start and select.
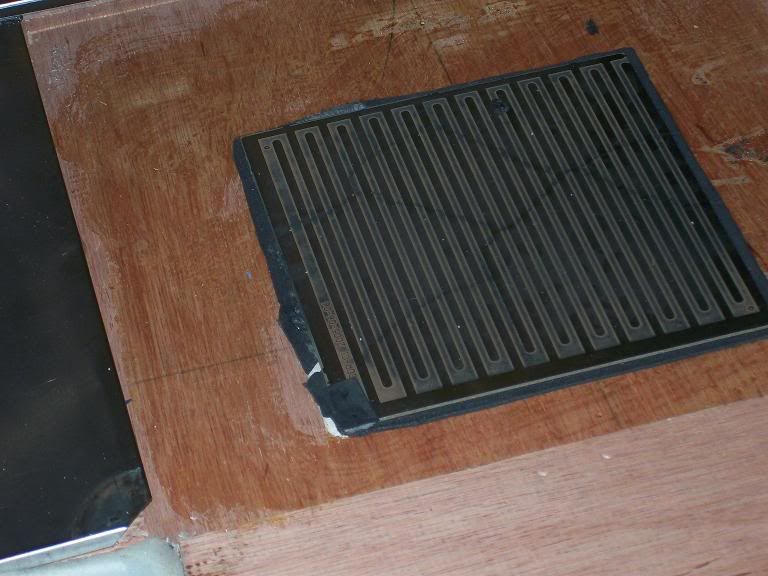
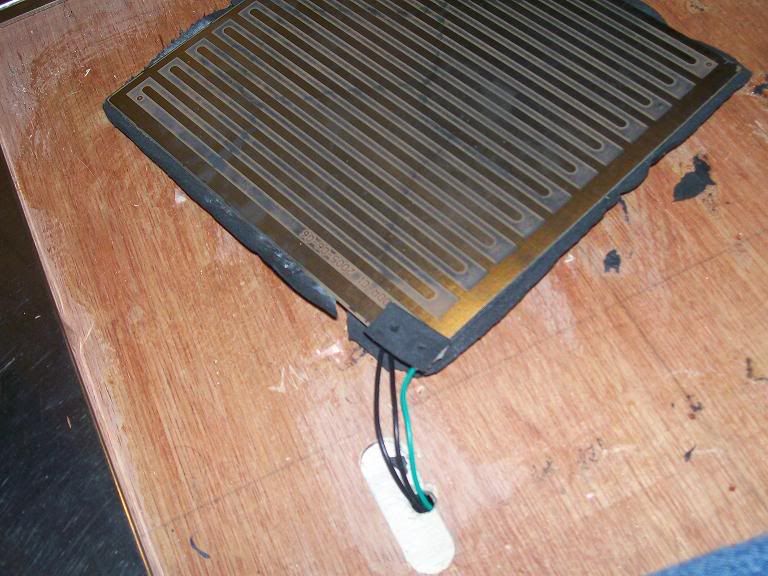
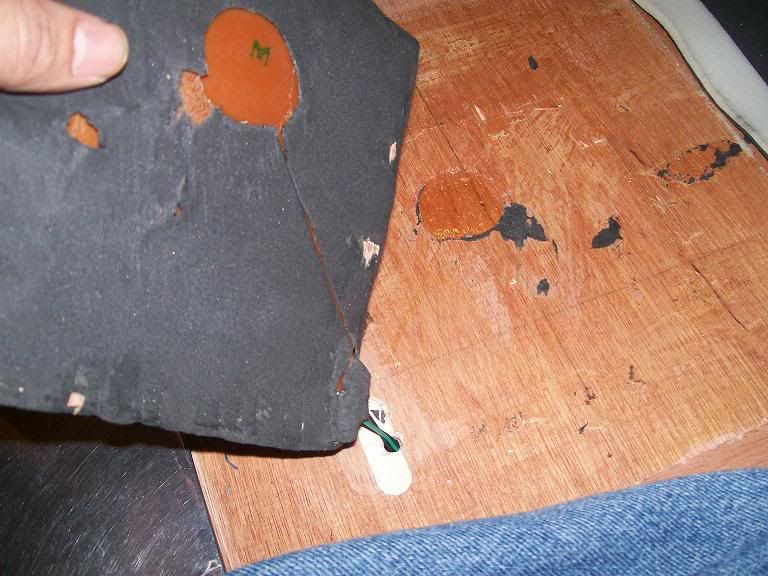
Picture of the left arrow and padding removed its just a crappy piece of metal with wiring going too it.
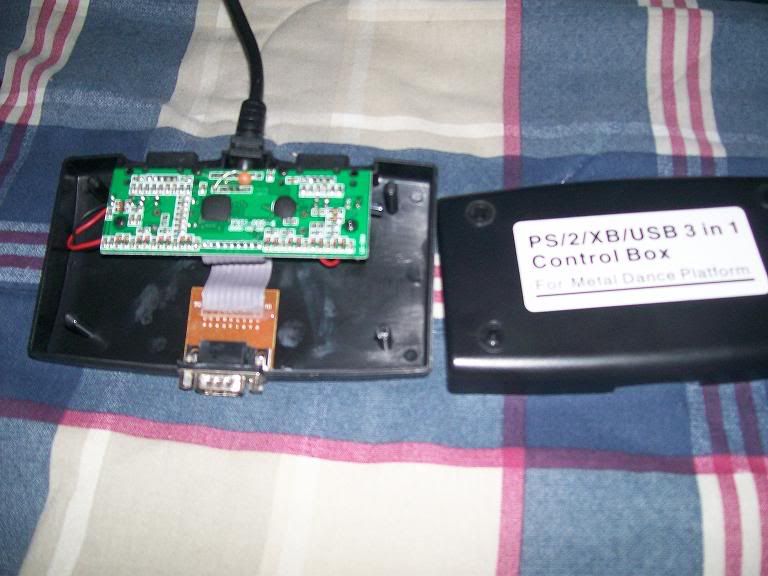
Picture of the control box opened. |
|
| Back to top |
|
 |
slvrshdw
Trick Member

Joined: 05 Jan 2005
|
2.  Posted: Wed Oct 01, 2008 3:06 pm Post subject: Posted: Wed Oct 01, 2008 3:06 pm Post subject: |
 |
|
The only issue with this one is how deep the arrow wells are. If they are only deep enough for the thin arrow plex panel, then it will be hard to modify it to put the arcade sensors in it.
_________________
|
|
| Back to top |
|
 |
mb41186
Trick Member


Joined: 25 Oct 2005
Location: Texas, Rio Grande Valley |
3.  Posted: Wed Oct 01, 2008 6:46 pm Post subject: Posted: Wed Oct 01, 2008 6:46 pm Post subject: |
 |
|
| slvrshdw wrote: | | The only issue with this one is how deep the arrow wells are. If they are only deep enough for the thin arrow plex panel, then it will be hard to modify it to put the arcade sensors in it. |
The wood is cutable, I would say its a centimeter thick and i was planning on cutting the boards on eafch panel. |
|
| Back to top |
|
 |
ChilliumBromide
Trick Member


Joined: 16 Jun 2006
Location: Beaverton, OR |
4.  Posted: Wed Oct 08, 2008 11:07 pm Post subject: Posted: Wed Oct 08, 2008 11:07 pm Post subject: |
 |
|
You could probably dremmel channels for the sensors. You'll need to make sure you have a mechanism that contacts the sensor though. Just using a bent metal tab that sits just above the sensor with a dense foam spacer between it and the sensor should be fine; that's all the bluesharks and arcade pads use. BeatGears use a slightly more complex mechanism, but if it's not being used on an industrial level, you don't have to worry too much about that.
It's probably not worth the time and money though. If you want to put in better sensors, just use Matrix sensors.
_________________
I used to be active here lol |
|
| Back to top |
|
 |
mb41186
Trick Member


Joined: 25 Oct 2005
Location: Texas, Rio Grande Valley |
5.  Posted: Wed Oct 22, 2008 10:09 pm Post subject: Posted: Wed Oct 22, 2008 10:09 pm Post subject: |
 |
|
Well I found a cheap set of ITG/PIU sensors on ebay for 60 bucks for 8 and started cutting the wood on my pad to get a better idea of how the inside/wiring would look like and see if I can even work with what I have.
here are some picture.
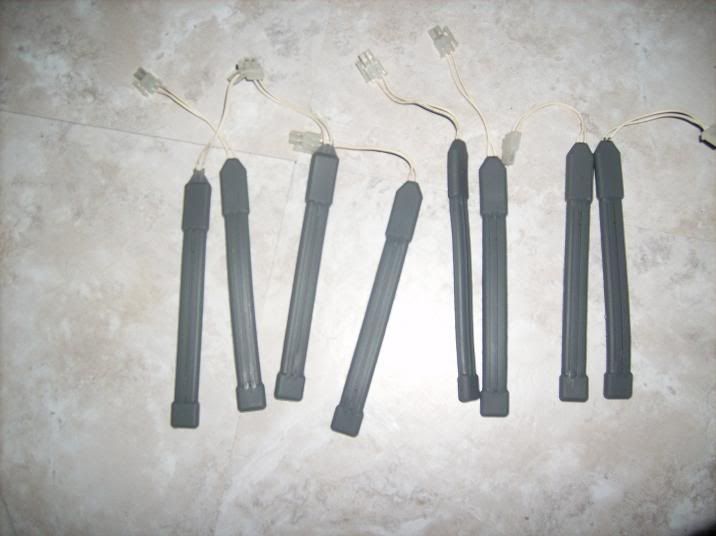
pictures of the sensors I bought.
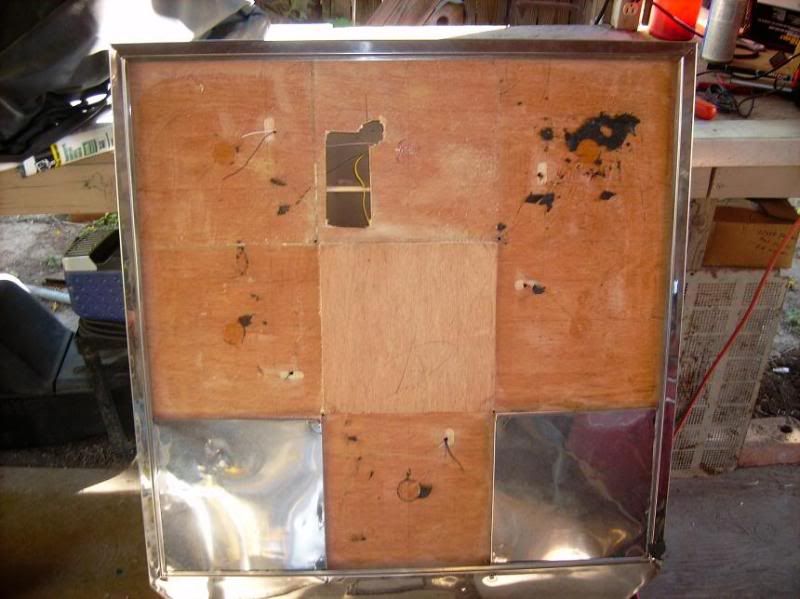
When I started cutting the crappy ply wood on top of the pad.
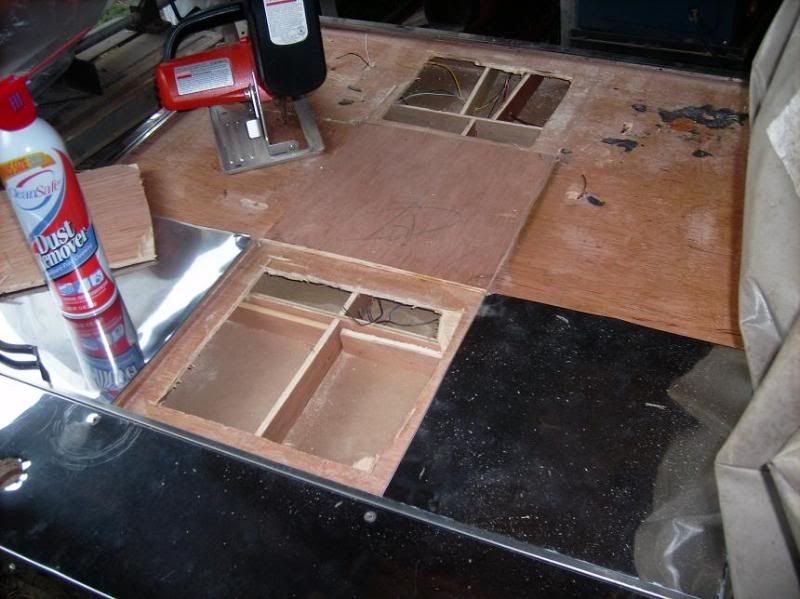
another photo of the wood being cut and the inside of pad.
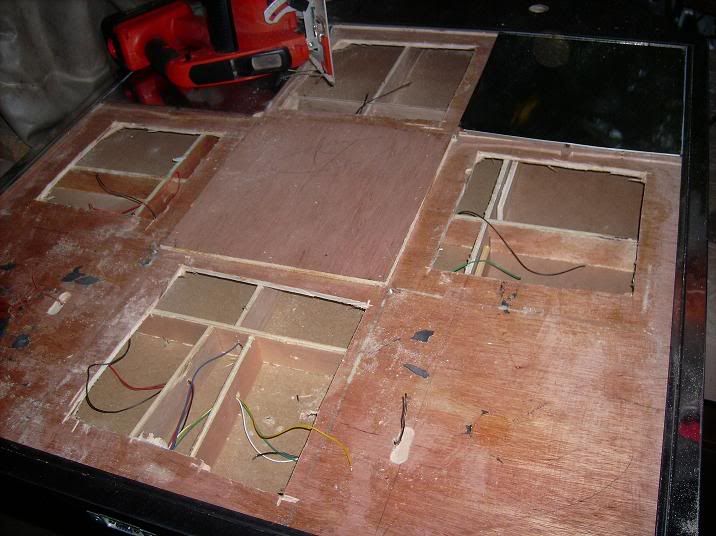
all sides cut.
Just need to figure out a wiring set up for the sensors and set up brackets/mods for the sensors. |
|
| Back to top |
|
 |
mb41186
Trick Member


Joined: 25 Oct 2005
Location: Texas, Rio Grande Valley |
6.  Posted: Fri Oct 24, 2008 11:05 pm Post subject: Posted: Fri Oct 24, 2008 11:05 pm Post subject: |
 |
|
Ok so I started messing with the wires and decided to cut a couple of sensors to see if they would work with the control box/wires that ran inside the metal pad.
Found out they did and managed to get 2 arrows to work for 1 panel by running the ground to a screw with 2 other wires connecting to each seperate sensor. The Yellow wire is the wire that runs from the control box so I did the same as the ground and ran that to a screw with 2 seperate wires running to the sensors.
Turned out I tried out both sensors and they both worked when I tested them on stepmania. Here's a picture
 |
|
| Back to top |
|
 |
Future Master
Trick Member


Joined: 10 Jan 2004
|
7.  Posted: Sat Oct 25, 2008 8:13 am Post subject: Posted: Sat Oct 25, 2008 8:13 am Post subject: |
 |
|
Those look like blueshark sensors. Regardless if they are or not you gonna need some arcade sensor brackets. So your gonna have to buy some off of mymybox.com or somewhere else. Your probably also gonna need the blueshark side panel support or make one your self. Your gonna need some kind of foam or spring to hold the arrow up.
_________________
Remember this name i will be your master someday... |
|
| Back to top |
|
 |
mb41186
Trick Member


Joined: 25 Oct 2005
Location: Texas, Rio Grande Valley |
8.  Posted: Sat Oct 25, 2008 11:31 am Post subject: Posted: Sat Oct 25, 2008 11:31 am Post subject: |
 |
|
| Future Master wrote: | | Those look like blueshark sensors. Regardless if they are or not you gonna need some arcade sensor brackets. So your gonna have to buy some off of mymybox.com or somewhere else. Your probably also gonna need the blueshark side panel support or make one your self. Your gonna need some kind of foam or spring to hold the arrow up. |
Essentially that what I wanted to do although mymybox is gay I might just make and modify everything myself out of wood.
its kind of fun doing this if this works out im going to make another metal pad out of scratch =P |
|
| Back to top |
|
 |
mb41186
Trick Member


Joined: 25 Oct 2005
Location: Texas, Rio Grande Valley |
9.  Posted: Sun Oct 26, 2008 8:38 pm Post subject: Posted: Sun Oct 26, 2008 8:38 pm Post subject: |
 |
|
Ok I know that no one cares at this point but I bought the acrylic panels at lowess cost me about 25 bucks for them. Decently thick like an Arcade panel will be hard to break.
Cut more into my metal pad so I can get an idea of where im going to put the sensors and how here's a pic of what im planning to do once I cut the wood and scew in the brackets for each sensor.
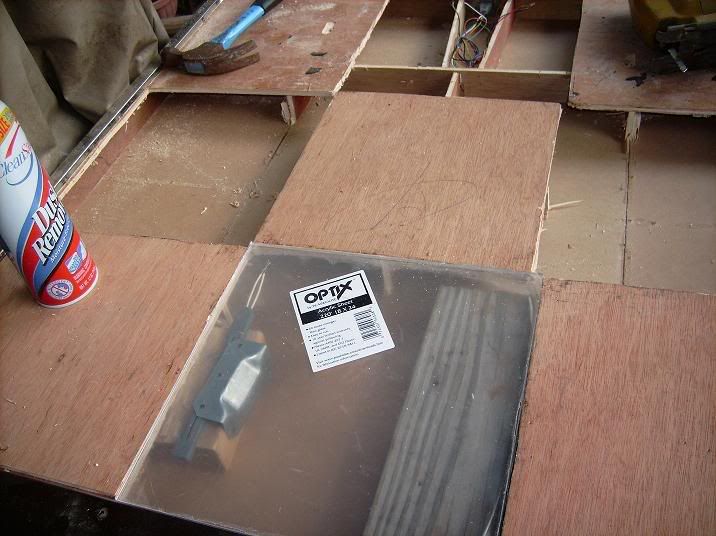
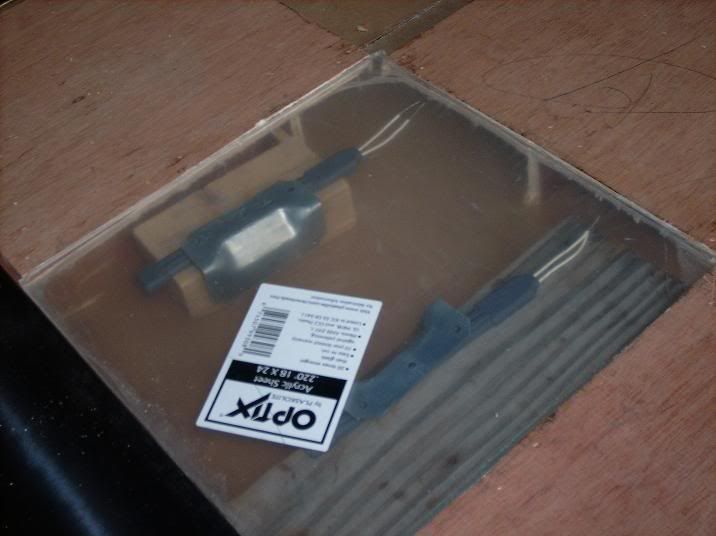
I really just need to cut the boards now that will go underneath. Run Wiring/Ground to each panel and then find brackets for the top of the panels. I might decide to cut the corner of each panel if I find brackets couldn't find them at lowes.
Then just a cool arrow design/Bar modification and im done  |
|
| Back to top |
|
 |
slvrshdw
Trick Member

Joined: 05 Jan 2005
|
10.  Posted: Mon Oct 27, 2008 8:19 pm Post subject: Posted: Mon Oct 27, 2008 8:19 pm Post subject: |
 |
|
I care at least!
Home Depot is the only place I know of that carries the corner brackets (and they are expensive!)
As for the plex, if it is .25" acrylic, it still might break because I have done that.
I see the bracket things over the sensors too. Good idea! The only problem that will probably happen is that they have to slide DOWN a bit to compress the sensor. I'm not sure what your plan is, but just keep that in mind if something goes wrong.
_________________
|
|
| Back to top |
|
 |
mb41186
Trick Member


Joined: 25 Oct 2005
Location: Texas, Rio Grande Valley |
11.  Posted: Mon Oct 27, 2008 10:47 pm Post subject: Posted: Mon Oct 27, 2008 10:47 pm Post subject: |
 |
|
| slvrshdw wrote: | I care at least!
Home Depot is the only place I know of that carries the corner brackets (and they are expensive!)
As for the plex, if it is .25" acrylic, it still might break because I have done that.
I see the bracket things over the sensors too. Good idea! The only problem that will probably happen is that they have to slide DOWN a bit to compress the sensor. I'm not sure what your plan is, but just keep that in mind if something goes wrong. |
lol I think the acrylic is .22 but im not sure. I would say its a centimeter thick but thicker than the panels the pad originally had which or like 2mm hah... here are some more pics..
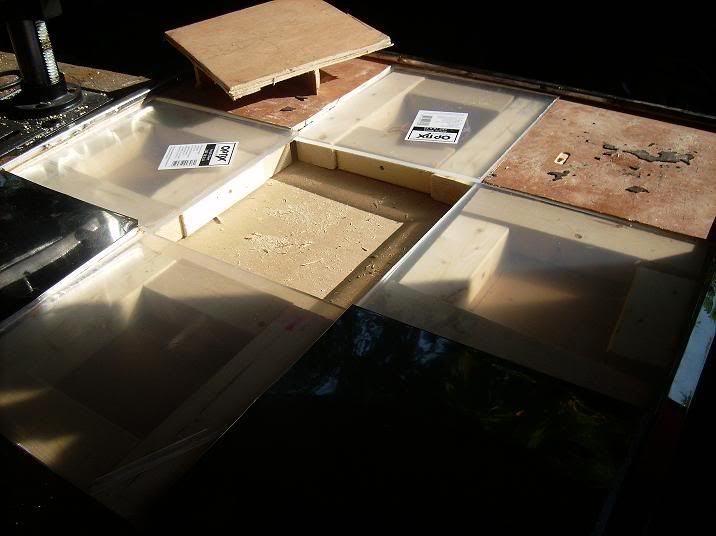
after I cut out the wood that will go underneath the panel
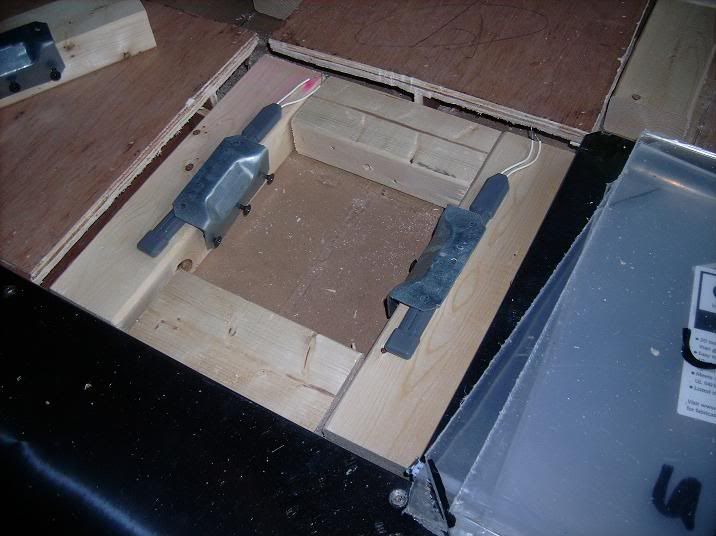
after I screwed on the brackets
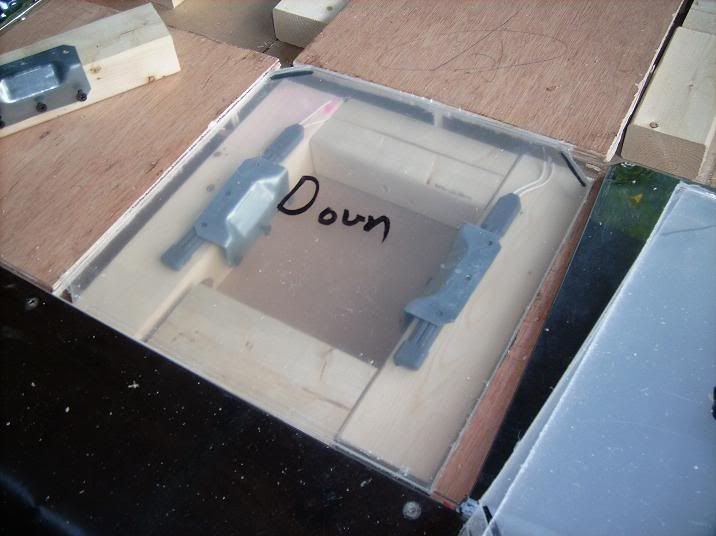
panels with brackets. |
|
| Back to top |
|
 |
mb41186
Trick Member


Joined: 25 Oct 2005
Location: Texas, Rio Grande Valley |
12.  Posted: Thu Oct 30, 2008 12:09 am Post subject: Posted: Thu Oct 30, 2008 12:09 am Post subject: |
 |
|
ok so I had a lil time to do stuff today... glued in all the wooden pieces with brackets.. Did all the wiring, even got to test it out on stepmania pretty sensative and accurate I just need to make some adjustments on the brackets...
Add corner brackets, Shave off a lil acyrlic paneling so It fits better, and then im done 
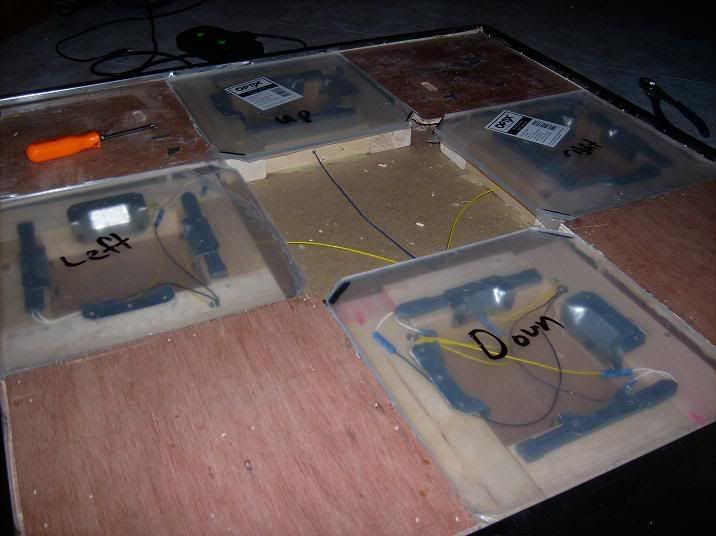
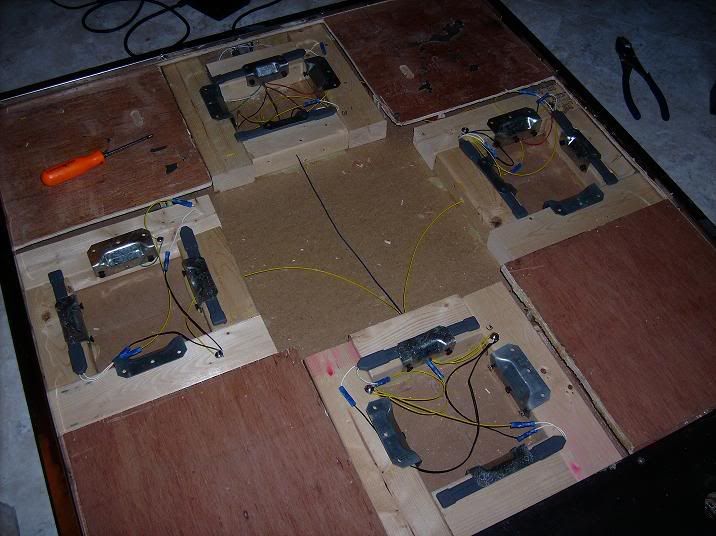 |
|
| Back to top |
|
 |
mb41186
Trick Member


Joined: 25 Oct 2005
Location: Texas, Rio Grande Valley |
13.  Posted: Mon Nov 03, 2008 12:57 am Post subject: Posted: Mon Nov 03, 2008 12:57 am Post subject: |
 |
|
Update****
Ok so im almost done with the pad, i'v tested it and for the most part it works although its not as sensative as I want it to be probably if I ordered 8 more sensors it would be ITG sensative ready for uber rave, here are some more pics
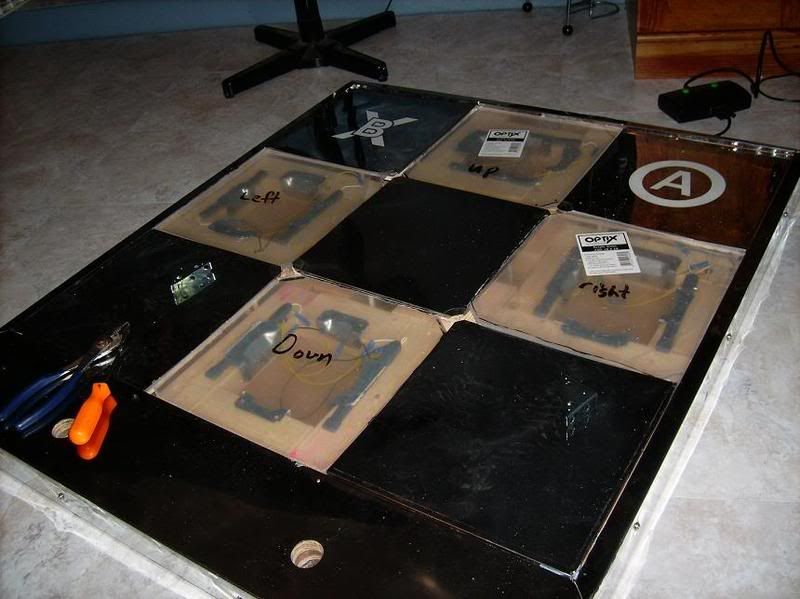
this is what it will look like once I drill and screw down on the sheet metal.
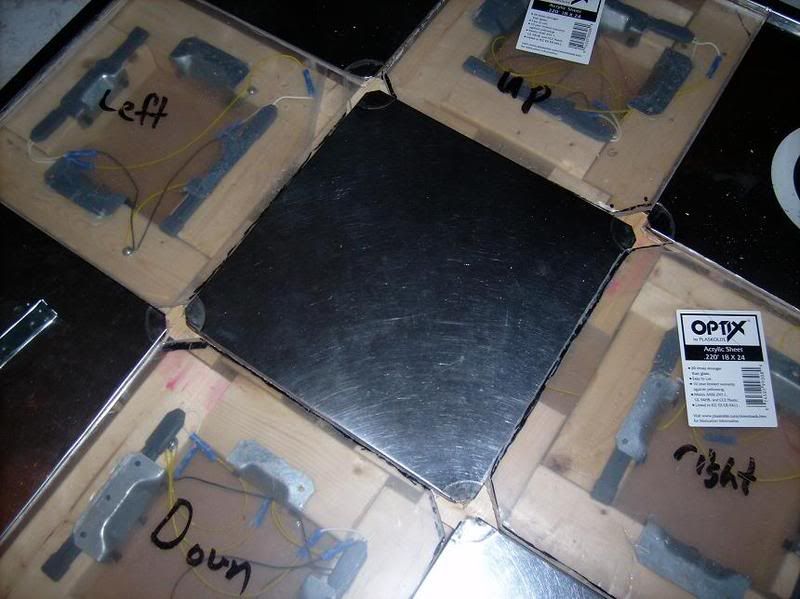
closer look of the inside of the arrows.

I decided to add cushion that goes underneath the arrows that I cut out from the old pad sensors and seems to have worked pretty well and cut down the sound.
Hopefully this week I will have the bar up and this thing fully funtional, as you can see I also have corner brackets at the top part of each arrow I could only afford 8 for now =P, dunno if I will buy the other 8 seeing is that they probably wont fit in the inner part of the arrows, will see though. |
|
| Back to top |
|
 |
|


